The safest way to turn a tree stump into a fire pit is to keep the stump decorative and place the fire in a proper noncombustible insert or surround. If the stump is unstable, rotting, or too close to structures, skip the shortcut and build a standard fire pit instead.
If you want to turn a tree stump into a fire pit, the safest version is usually to use the stump as a decorative surround or remove enough of it to create a noncombustible fire-pit base. A live, unstable, or dry stump should not be treated like a ready-made fire feature without careful modification and local code checks.
- Safety first: A stump is wood, so it should not be treated like a ready-made fire.
- Best approach: Use the stump as a surround and install a fire ring, bowl, or insert.
- Check rules: Confirm burn bans, permits, setbacks, and HOA or landlord limits before building.
- Plan for upkeep: Inspect for rot, cracking, moisture, pest damage, and heat wear over time.
How to Turn a Tree Stump Into a Fire Pit: What You Can Do, What You Shouldn’t, and the Safest Way to Start
There is a big difference between using a stump near a fire pit and burning inside a stump. Wood is fuel, so any project that keeps the stump close to flame needs a heat barrier, a stable insert, and enough clearance to reduce the chance of ignition, smoke damage, or collapse.
Why a stump can work as a rustic fire-pit base — and when it is a bad idea
A stump can create a rustic look, help visually anchor a fire area, and sometimes provide a natural surround for a metal bowl, ring, or insert. That said, it is only a good idea when the stump is dead, stable, dry enough to work with, and separated from the fire by noncombustible materials.
It is a bad idea if the stump is hollowing out unpredictably, showing heavy rot, attracting insects, or sitting too close to a deck, fence, shed, or overhanging branches. If the stump is still anchored by roots that may shift, or if you are not sure what is underground, treat the project as a removal-and-rebuild job instead of a shortcut.
Quick answer: the safest approach is usually to remove or heavily modify the stump before using it with fire
The safest approach is usually to cut the stump down, excavate around it as needed, and install a fire pit in a noncombustible base rather than lighting fire directly in the wood. If you want the stump look, keep it as a decorative outer shell and place a proper fire ring, bowl, or gas insert inside a protected opening.
Do not assume a stump is safe just because it is old or mostly dry. Wood can smolder internally, and hidden roots or rot can make the structure unpredictable when exposed to heat.
Before You Begin: Safety, Local Rules, and Site Checks for a Backyard Fire Pit
Before any digging or cutting starts, confirm that a fire feature is allowed where you live. Rules vary by municipality, HOA, landlord, and fire district, and they may also change during burn bans or drought conditions.
Verify burn restrictions, permits, and setback rules from your local fire department or municipality
Ask your local fire department or city office whether open burning, solid-fuel fire pits, or gas fire features require a permit. Also confirm setback rules for property lines, structures, and neighboring fences, since those distances are code- and location-specific.
If you live in a rental or shared-property setting, get written approval before modifying the yard. A decorative project can become a liability issue if it violates lease terms or community rules.
Check overhead branches, fences, structures, dry grass, and underground utilities
Clear the area around the stump and look up as well as down. Overhanging limbs, low rooflines, dry landscaping, and nearby wooden structures can all increase fire risk.
Before digging, contact utility-locating services in your area so you do not hit gas, electric, water, or communication lines. Underground utilities are not always obvious, especially in older yards or recently landscaped spaces.
Clearances to confirm from the fire pit manual or product instructions if you use a metal insert or kit
If you are installing a fire ring, bowl, burner, or prefab kit, follow the manufacturer’s instructions for clearances, base materials, and ventilation. Those details are model-specific and should override guesswork.
Clearance needs can vary by fuel type, insert shape, surrounding materials, and whether the unit is meant for in-ground, above-ground, or recessed installation.
How It Works: Turning a Tree Stump Into a Fire Pit Base or Surround
The basic idea is to separate the fire from the stump and use the stump as a visual feature, not as the combustion chamber. In practice, that means building a noncombustible fire zone inside, on top of, or next to the stump rather than relying on the wood itself.
Common setup options: decorative surround, recessed fire bowl, or full stump removal with a pit installed in the opening
There are three common approaches. The first is the easiest: keep the stump in place and install a metal fire bowl or ring nearby, using the stump as a design element.
The second is a recessed setup, where part of the stump is removed and a lined opening is created for a fire pit insert. The third is full stump removal followed by a standard fire pit build with gravel, pavers, stone, or a prefabricated kit.
| Option | Best For | Key Consideration |
|---|---|---|
| Decorative surround | Homeowners who want the stump look | Fire must stay separated from wood |
| Recessed insert | More advanced DIY projects | Needs careful excavation and lining |
| Full removal and rebuild | Longest-lasting result | More labor, but usually safest |
Fuel type considerations: wood-burning vs. propane or natural gas insert kits
Wood-burning fire pits are simpler and create a classic campfire feel, but they produce sparks, ash, and more heat stress on nearby materials. Propane and natural gas inserts offer easier control and cleaner operation, but they require the right kit, proper ventilation, and safe fuel-line planning.
Never improvise a gas conversion or alter a burner system beyond the manufacturer’s instructions. If you want gas, choose a kit designed for the installation style you have in mind.
Ventilation, heat transfer, and why untreated wood stumps are a fire risk
Even if a stump does not ignite immediately, heat can travel through the wood and dry it further over time. That creates a slow-burn hazard that may not be obvious during the first few uses.
Smoldering wood can continue to burn at low oxygen levels, which is one reason hidden fire damage can develop in wood-based backyard features.
Materials, Tools, and Key Specifications to Plan For
Good planning matters more here than in a typical fire-pit build because stump conditions vary widely. A soft, rotting stump behaves very differently from a hard, dry one, and the right materials depend on whether you are building around, into, or replacing it.
Stump size, depth, moisture level, and rot condition
Measure the stump’s diameter, height, and any hollowed-out areas before choosing an insert or ring. Check whether the wood is soft, crumbly, wet, or infested, since those conditions can affect stability and lifespan.
If the stump is deeply rotted, it may be better as a temporary decorative feature than a structural base. A sound-looking top can hide weak sides or decayed roots.
Fire pit dimensions, insert diameter, heat shield needs, and noncombustible liner materials
Match the insert or ring to the opening you plan to create, not the other way around. You may also need a heat shield, stone liner, or metal barrier to protect the surrounding stump and any adjacent hardscape.
Tools and supplies: shovel, saw, drill, gravel, pavers, fire ring, heat-resistant mortar, and protective gear
Common supplies include a shovel, pruning saw or reciprocating saw for root cleanup, drill for drainage or vent holes where appropriate, gravel, pavers, fire ring or bowl, and heat-resistant mortar or masonry adhesive if the design calls for it. You should also have gloves, eye protection, and sturdy footwear.
Step-by-Step Backyard How-To: Preparing the Stump Area and Building the Fire Pit
For most homeowners, the safest path is to prepare the stump area first and then build a noncombustible fire pit inside or beside it. The steps below focus on reducing fire risk and improving stability rather than trying to burn the stump itself.
Remove bark, roots, loose debris, and any flammable material around the stump
Start by clearing leaves, mulch, dry grass, bark flakes, and loose wood chips from the area. If the stump has peeling bark or soft outer sections, remove what you can without creating an unstable structure.
Also clear nearby combustible landscaping materials. A tidy perimeter reduces the chance that stray embers or radiant heat will ignite something outside the pit.
Excavate or level the area, then add a noncombustible base such as gravel or stone
Level the ground where the fire feature will sit and excavate enough material to create a stable base. A compacted gravel or stone layer is a common choice because it helps with drainage and keeps the fire feature off bare soil.
If the site is damp or uneven, take extra care with grading so water does not pool under the fire pit. Standing water can weaken the base and shorten the life of the surrounding materials.
Install a fire ring, bowl, or insert and maintain safe spacing from the stump and surrounding materials
Place the fire ring, bowl, or insert according to the manufacturer’s instructions and keep it centered on the noncombustible base. Maintain enough space so heat does not directly contact the stump unless the product is specifically designed for that arrangement.
- Use a noncombustible liner, ring, or base
- Follow the insert or kit instructions exactly
- Keep the stump outside the direct flame zone
- Lighting fire directly inside the wood stump
- Trapping heat with no ventilation
- Guessing at spacing or fuel requirements
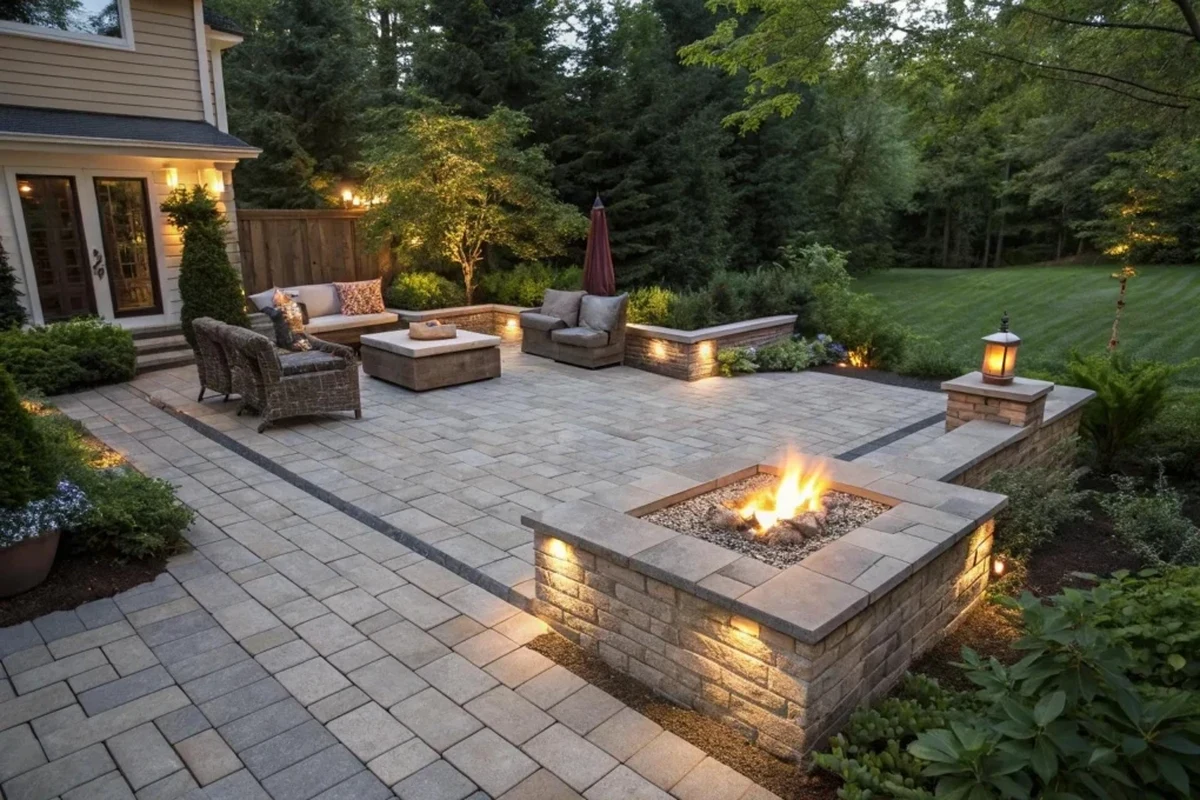
Finish the surround with stone, brick, or pavers for stability and a cleaner look
Once the functional part is in place, you can finish the outer surround with stone, brick, or pavers to improve stability and appearance. This is also the stage where you can make the stump look intentional instead of leftover.
Use materials rated for outdoor exposure and avoid finishes that crack under heat. If the surround will see direct flame or high radiant heat, choose materials intended for that environment.
Real-Use Benefits, Design Trade-Offs, and Best Alternatives
A stump-based fire feature can look unique and may fit a small backyard better than a large prefabricated setup. But it also creates more maintenance questions than a standard fire pit, especially as the wood ages and the weather changes.
Benefits: rustic aesthetic, backyard focal point, lower-cost repurposing, and space-saving design
The biggest appeal is visual. A stump can turn an otherwise awkward part of the yard into a conversation piece, especially if you want a natural or cabin-style look.
It can also be a practical repurposing project if the stump is already in place and you want to avoid a full landscape overhaul. In a compact yard, integrating an existing feature can save space.
- Distinct rustic look
- May reuse an existing stump feature
- Can save space in smaller yards
- Wood decay can shorten lifespan
- Higher heat and smoke risk near wood
- More upkeep than a standard fire pit
Limitations: stump decay, insect activity, smoke, heat damage, and shorter lifespan than a dedicated fire pit
Wood stumps naturally break down over time, and fire exposure can accelerate that process. Insects, moisture, and freeze-thaw cycles can also weaken the structure.
Even if the fire pit works well at first, the surrounding wood may need periodic inspection and eventual replacement. That makes this a design choice with a shorter expected life than a purpose-built stone or steel fire feature.
Alternatives: stone fire pit, steel fire bowl, propane fire table, or gas insert for easier control
If your main goal is backyard warmth and reliability, a dedicated stone fire pit or steel fire bowl is usually simpler. If you want easier ignition and less ash, a propane fire table or gas insert may fit better.
Good for homeowners who want durability, a permanent look, and less concern about nearby combustible wood.
Better if you want cleaner operation and simpler control, but it depends on proper fuel setup and local rules.
Safe Use, Shutdown, and Seasonal Care for a Stump-Based Fire Pit
Once the fire feature is built, the main priorities are weather awareness, controlled fire size, and regular inspection. A stump-based design needs more attention than a standard pit because the surrounding material can age, crack, or dry out.
Wind and weather considerations: avoid use in high wind, drought, or dry leaf conditions
Do not use the fire pit in high wind, during burn bans, or when the surrounding yard is covered in dry leaves or debris. Wind can carry embers farther than expected, and dry conditions make ignition easier.
If your area gets frequent gusts, consider a spark screen and a more sheltered location, while still keeping required clearances. Shelter should never mean enclosed or poorly ventilated space.
Safe operation: fire size, spark control, supervision, and keeping water or an extinguisher nearby
Keep the fire modest rather than building a tall, aggressive flame near wood. Use a spark screen if your setup allows it, and never leave the fire unattended.
Keep a bucket of water, hose, or an appropriate extinguisher nearby, and make sure everyone in the household knows how to use it. Children and pets should be kept at a safe distance from the heat zone.
Shutdown steps: let embers burn out, extinguish fully, and remove ash only after complete cooling
When you are done, let the fire burn down naturally if possible, then extinguish any remaining embers fully according to safe fire-practice guidance. Do not assume ash is cool just because flames are gone.
Only remove ash after everything has cooled completely. Hot ash can stay dangerous for much longer than people expect, especially inside a recessed or insulated setup.
Storage and seasonal maintenance: cover the pit, inspect for rot or cracking, and check for pest damage
Cover the fire pit when it is not in use to reduce water intrusion and debris buildup. Seasonal inspections should include the stump, the liner, the surround, and any fasteners or masonry joints.
Look for rot, cracking, warping, insect activity, or shifting stones before each season. If the structure changes shape or starts to feel unstable, stop using it until it is repaired or replaced.
Common Mistakes, Troubleshooting, and Final Recommendation
Most problems with stump-based fire pits come from treating the stump like a normal fire feature material. It is not. The safest designs use the stump as a visual element and rely on noncombustible materials for the actual fire zone.
Common errors: using a live or unstable stump, skipping a noncombustible barrier, or placing the pit too close to structures
One of the biggest mistakes is building around a stump that is still alive, soft, or shifting in the ground. Another is skipping the liner or base because the wood “looks sturdy enough.”
Placement errors are just as serious. Even a well-built fire pit becomes a poor choice if it sits too close to a fence, deck, shed, or overhanging branch.
Troubleshooting smoke, uneven burning, water pooling, and heat damage around the base
If smoke is excessive, check whether the fuel is damp, the airflow is restricted, or the opening is too small for the insert. Uneven burning often points to poor airflow, a warped insert, or an unlevel base.
Water pooling usually means drainage needs improvement. Heat damage around the base suggests the fire is too large, the spacing is too tight, or the materials surrounding the pit are not suitable for repeated exposure.
Who should choose this project, who should skip it, and the safest final verdict for 2025
This project fits DIY homeowners who want a rustic look, are comfortable checking local rules, and are willing to build a real noncombustible fire base. It is less suitable for anyone who wants a quick shortcut, a permanent high-heat feature, or a setup near structures and dry landscaping.
Turning a tree stump into a fire pit can work as a design project, but only if the fire is kept off the wood and the structure is built with proper clearance, drainage, and a noncombustible insert or surround. If you want the safest, longest-lasting result, remove or heavily modify the stump and build a standard fire pit instead; if you keep the stump, treat it as decoration, not the fire chamber.
Frequently Asked Questions
Usually no. A stump is wood, so it can smolder, crack, or ignite unpredictably unless it is heavily modified and separated from the fire by noncombustible materials.
Use the stump as a decorative surround and place a proper fire ring, bowl, or insert on a noncombustible base. Follow the manufacturer’s instructions for the specific kit you choose.
Yes. Burn bans, permits, setbacks, HOA rules, and landlord restrictions can all affect whether the project is allowed and how it must be built.
A compacted noncombustible base such as gravel or stone is commonly used, but the right setup depends on the insert or kit instructions and local site conditions.
Wood-burning is simpler but creates more sparks, ash, and heat stress near wood. Gas inserts are cleaner and easier to control, but they must be installed according to the manufacturer’s instructions and local rules.
Cover it when not in use, inspect for rot, cracking, pest damage, and shifting materials, and stop using it if the stump or surround becomes unstable.